Many popular organizations use Exchange Server as the mail server for the purpose of local communication and data synchronization. Sometime users face trouble in installing Exchange Server 2010 in the Organization. This blog contains the steps by steps procedure to install Exchange Server 2010.
1). Operating System Required – 64 Bit (Window Server 2008 R2)
Now Configure Static IP of your Machine:
To configure IP address, first of all click on the Start Button and then open Control panel. Now Open Network and Sharing Center and then click on the Change Adapter Settings. Now choose you network connection and open its properties by right clicking on it. Then click on the Internet Protocol Version 4 and open its properties.
Now install AD (Active Directory)
Next step to proceed further is the installation on Active Directory. For that first click on Start Button and then click on Administrative Tools >> Now select view network connection >> Now open properties of Private Adapter by right clicking on it. From here select Internet Protocol version 4 >> Then copy the IP address from the IP address field and paste it in the Preferred DNS server box. After that click on ok button.
Now install the Active Directory Lightweight Directory Service
After that Install Window Process Activation Service Feature
Installing the Web Server Role
Download and Install the PowerShell
2). Now Install Exchange Server 2010.
3). Make Net.Tcp port Sharing Service Enable
Open Services from the Service Manager >> Then click on Net.TCP port Sharing Services >> After that Make it Automatic in the Startup Time
4). Configure the Authenticated Access to the Exchange Server.
Adding the Signature
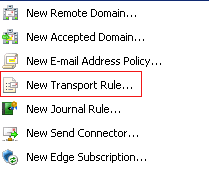
For that Click on Organization Configuration >> Transport Rule tab >> In the introduction type any name (Make a check on Enable Rule) >> Click on From users that are inside or outside the organization from the condition part >> Click on Next >> Select Append Disclaimer Text And Failback To Action If Unable To Apply from the Action part >> Next >> Next >> Finish

After that Create Send Connector
Click on Send Connector Tab >> New Send Connector >> Enter name in the introduction part and Select Internet from the select the intended use for this send connector >> Next >> Now click on the Add Button and enter * in it (To include all sub domains). >>Select Use domain name system MX records to route mail automatically from the Network Setting Tab and select Use the external DNS lookup setting >> Click on Add Server from the Source Part >> In the New connector click on New >> Click on Finish.